Table of Contents
- 1 What is Aloo Nargisi Kofta?
- 2 Why You’ll Love Aloo Nargisi Kofta
- 3 Ingredients You’ll Need
- 4 For the Nargisi Koftas
- 5 For Dhaba Style Gravy
- 6 Whole Spices
- 7 You'll need:
- 8 Spice Powders for Gravy
- 9 For Gravy
- 10 Step 1 Boil and Season the Eggs
- 11 Step 2 Prepare the Perfect Potato Mixture
- 12 Step 3 Shape the Perfect Nargisi Koftas
- 13 Step 4 Fry the Koftas Until Crispy and Golden
- 14 Step 5 – Making of Onion/Tomato Base
- 15 Step 6 Finish the Dhaba Style Gravy
- 16 Step 7 Add the Koftas and Serve
- 17 Serving Suggestions
- 18 Storage and Reheating Tips
- 19 Variations For You
- 20 Avoid These Mistakes
- 21 Tips for the Best Aloo Nargisi Kofta
- 22 Frequently Asked Questions
- 23 Final Thoughts
If you’re bored of the usual aloo or egg curry and want something a little more special, you should definitely try this Aloo Nargisi Kofta.
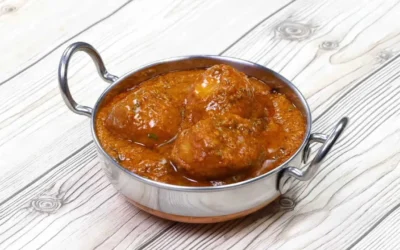
It’s a boiled egg wrapped in a spiced potato layer, fried till golden, and then served in a rich, dhaba-style onion-tomato gravy. It looks impressive when you bring it to the table, but it’s actually made with very simple ingredients that most Indian kitchens already have.
One tip I’ve learned after making this a few times is to grate the boiled potatoes instead of mashing them — it helps the koftas hold their shape much better while frying.
I also like to add the koftas to the gravy only just before serving so they stay nice and crisp on the outside instead of going soggy.
Whether it’s a weekend family meal or a special occasion, this dish delivers that restaurant-style flavour without too much hassle.
Follow the step-by-step instructions below — I’ve also added some practical tips to help you get perfectly crispy koftas and a really flavourful gravy.
What is Aloo Nargisi Kofta?
So Aloo Nargisi Kofta is basically the vegetarian take on the Mughlai original.
No meat here — just boiled eggs coated in spiced mashed potatoes with stuff like gram flour, rice flour, coriander, green chillies, and whatever basic spices you have.
Fry them up till they’re nice and golden, then simmer them in a heavy onion-tomato gravy.
The name “Nargisi” comes from the Nargis flower — slice it open and you’ll see that beautiful yellow yolk centre surrounded by egg white and golden potato. It looks stunning and tastes even better.
Crispy outside, soft potato in the middle, tender egg, and that creamy gravy… every bite hits different.
Don’t let the fancy look scare you — it’s pretty easy to make at home and totally worth it.
Why You’ll Love Aloo Nargisi Kofta
The moment you cut into these koftas, you get that satisfying crispy shell giving way to soft, spiced potato and a perfectly cooked egg in the centre. It’s seriously addictive.
The gravy is proper dhaba-style — and full of flavour from slow-cooked onions, tomatoes, yoghurt, and whole spices. It soaks into the koftas beautifully and tastes amazing with naan, roti, or rice.
Best part? Everything is made from regular Indian kitchen staples. Potatoes, eggs, basic spices, gram flour — nothing fancy or expensive.
It looks impressive on the table, so I often make it for weekend family meals, small gatherings, festivals, or when friends come over. People always ask for the recipe.
You can also prep it smartly — fry the koftas a day ahead and make the gravy separately. Just combine them at the end so the koftas stay crispy. Super handy when you’re hosting.
With a couple of simple tricks (grating the potatoes, seasoning the eggs well, and cooking the masala till oil separates), it easily gives you that restaurant-style taste at home.
Next, I’ll show you the ingredients and why each one actually matters for best results.
Ingredients You’ll Need
One of the reasons I love making this Aloo Nargisi Kofta Recipe is that it doesn’t require any fancy or hard-to-find ingredients.
Everything used in this recipe is commonly available in an Indian kitchen, yet when combined correctly, they create a rich and flavourful dish that tastes just like something you’d order at a good dhaba.
For the Nargisi Koftas
Serves 4- 4 Boiled Eggs
- 4 Medium Boiled Potatoes
- Gram Flour (Besan)
- Rice Flour
- Green Chillies
- Fresh Coriander
- Spice Powders
- 4 Boiled Eggs: These are the star of the dish. They give the koftas their classic look and make them really filling. I always boil them till just hard-boiled — not overdone — because overcooked eggs get that grey ring around the yolk and turn a bit rubbery.
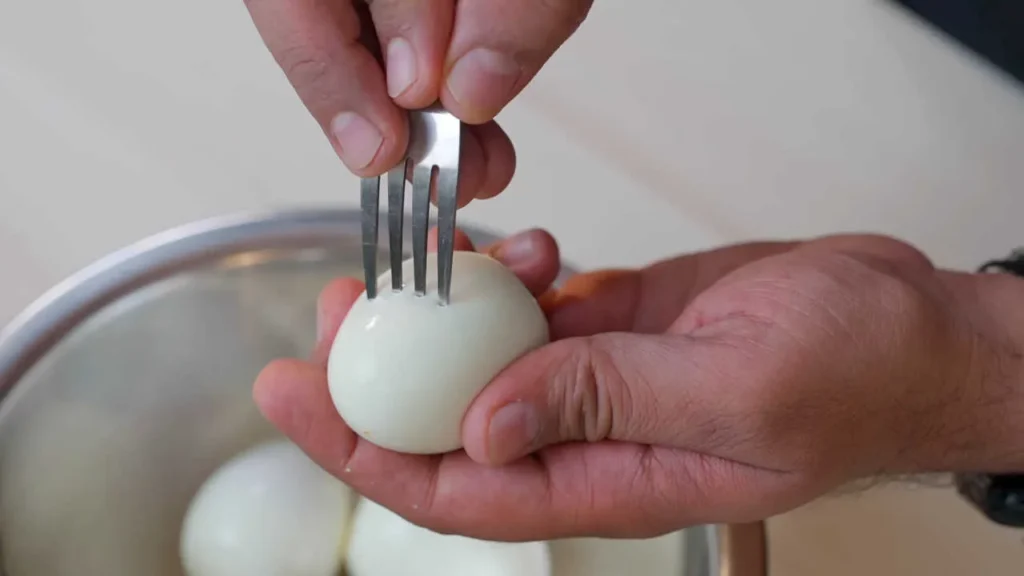
After peeling, I poke a few tiny holes with a toothpick or fork. This little trick lets the spices seep inside so the eggs actually taste seasoned, not bland.
- 4 Medium Boiled Potatoes: Potatoes make up the outer layer, so they need to be handled right.
Once they’ve cooled down completely, grate them instead of mashing. Grated potatoes give you a much better texture, wrap around the eggs easily, and the koftas are less likely to crack or break while frying. Never use hot potatoes — the extra moisture will make the mixture sticky and hard to handle.
- Gram Flour (Besan): Besan is what holds everything together. It gives a nice subtle nutty taste and acts as the main binder. If your potato mix feels too loose or wet, just add an extra spoon of besan — it usually fixes it straight away.
- Rice Flour: This is my little secret weapon. A small amount of rice flour in the mixture makes the koftas noticeably crispier on the outside. A lot of people skip it, but once you try it, you won’t want to leave it out.
- Green Chillies: I add finely chopped fresh green chillies for that fresh heat and sharpness. Adjust according to how spicy your family likes it.
- Fresh Coriander: A good handful of chopped coriander brightens up the whole mixture and adds freshness. I only use fresh — dried just doesn’t give the same lift.
- Everyday Spice Powders
- I season the potato mixture with:
- Salt
- Red chilli powder
- Roasted cumin powder
- Garam masala
- Chaat masala
- Ajwain (carom seeds)
Each one does its job — red chilli for heat, roasted cumin for smokiness, garam masala for warmth, chaat masala for tang, and ajwain for flavour plus better digestion. When they all come together, the koftas taste properly seasoned in every bite.
For Dhaba Style Gravy
Serves 4- 3 medium Onions
- Garlic
- 4 Medium Tomatoes
- 1 Inch Ginger
- 7 Green Chillies
- Yoghurt
- Onions: Take 3 medium onions and blend them with garlic to create a smooth paste. Cooking this paste patiently until it turns golden is one of the biggest secrets to achieving authentic dhaba flavour.
- Garlic: Garlic gives the gravy a bold and slightly smoky taste. Fresh garlic always delivers better flavour than garlic paste from a jar.
- Tomatoes: Tomatoes balance the richness of the onions and yoghurt with natural sweetness and acidity. Choose ripe red tomatoes for the best colour and flavour.
- Ginger: Fresh ginger adds warmth and freshness to the gravy, It also helps balance the richness of the fried koftas.
- Green Chillies: A couple of green chillies blended into the tomato paste give the gravy a gentle heat without making it overly spicy.
- Yoghurt: Whisked yoghurt makes the gravy creamy without adding heavy cream. Always whisk it well before adding it to the pan. To prevent curdling, lower the heat and stir continuously while mixing it into the masala.
Whole Spices
You'll need:
Serves 4- Cumin seeds
- Black cardamon
- Green cardamoms
- Cloves
- Bay leaf
- Dried red chillies
Spice Powders for Gravy
For Gravy
Serves 4- Turmeric powder
- Kashmiri red chilli powder
- Coriander powder
- Salt
- Garam masala
- Roasted cumin powder
- Kasuri methi
Step 1 Boil and Season the Eggs
The first step might seem simple, but it makes a huge difference to the final flavour of the dish.
Place the eggs in a saucepan and cover them completely with water. Bring the water to a boil over medium-high heat, then continue cooking until the eggs are perfectly hard-boiled.
Once cooked, transfer them immediately to cold water, this stops the cooking process and makes peeling much easier.
Carefully remove the shells without damaging the eggs, now comes a small trick that many people skip.
Take a fork or toothpick and gently prick tiny holes all over each boiled egg. Don’t push too deeply—just enough to create small openings. These tiny holes allow the seasoning to seep inside instead of remaining only on the surface.
Sprinkle a little salt, red chilli powder and chaat masala over the eggs, Rub the spices gently with your hands until every egg is evenly coated.
Leave them aside for about 10 minutes while you prepare the potato mixture. During this resting time, the eggs absorb the seasoning, making them much more flavourful after frying.
Step 2 Prepare the Perfect Potato Mixture
While the eggs are resting, it’s time to prepare the outer coating.
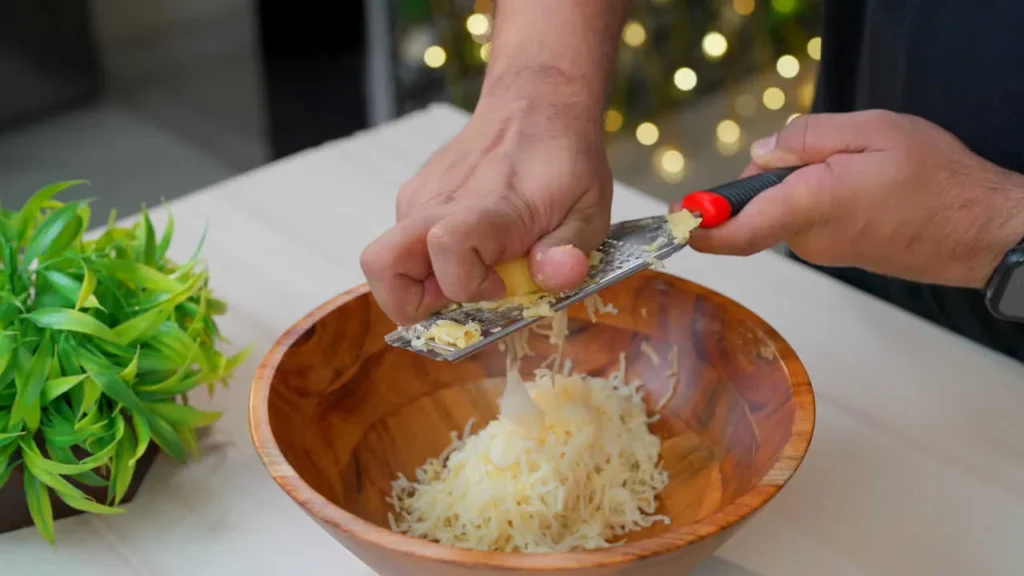
Take the boiled potatoes that have completely cooled. Using a grater, grate each potato into a large mixing bowl.
Although mashing may seem easier, grating creates a finer texture that wraps around the eggs much more smoothly. It also prevents cracks from forming while frying.
Add salt, red chilli powder, roasted cumin powder, garam masala, chaat masala, ajwain, chopped green chillies and freshly chopped coriander.
Now sprinkle in the gram flour and rice flour, using your hands, gently mix everything together until the spices are evenly distributed.
Avoid overworking the mixture. It should feel soft, smooth and easy to shape without sticking excessively to your hands.
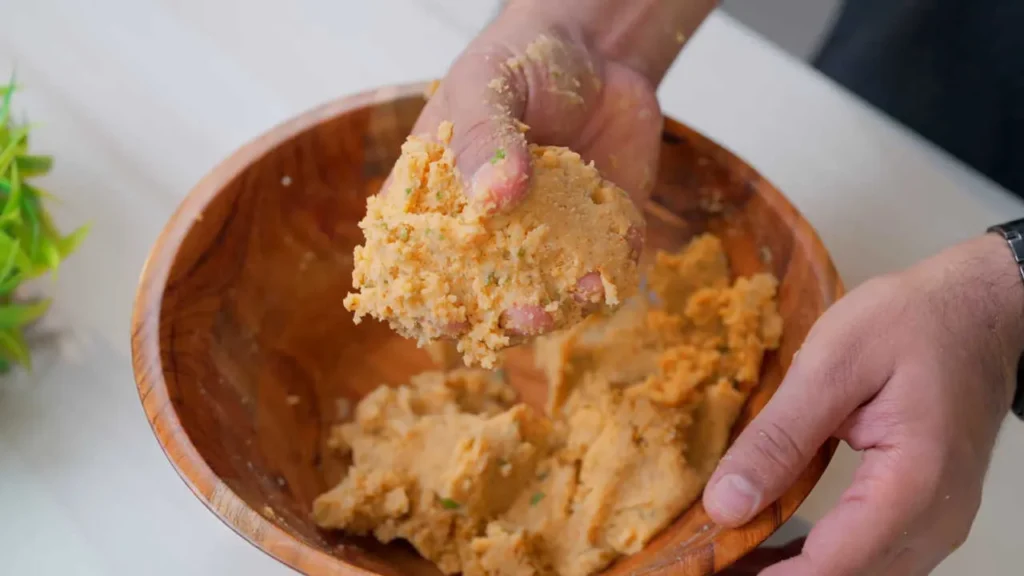
If the mixture feels too wet, add another spoonful of gram flour. If it feels dry, sprinkle a teaspoon of water and mix again.
A perfectly balanced potato mixture is the secret to koftas that stay intact while frying and remain soft after cooking.
In the next section, we’ll wrap the eggs, fry the koftas until beautifully golden, and then prepare a rich dhaba-style onion and tomato gravy that brings the whole dish together.
Step 3 Shape the Perfect Nargisi Koftas
Now comes the most exciting part of the recipe—wrapping the seasoned eggs in the spicy potato mixture. Don’t worry if you’ve never made Nargisi Koftas before. As long as the potato mixture has the right consistency, shaping them is much easier than it looks.
Before you begin, lightly grease your palms with a few drops of oil. This prevents the potato mixture from sticking to your hands and helps create a smooth finish.
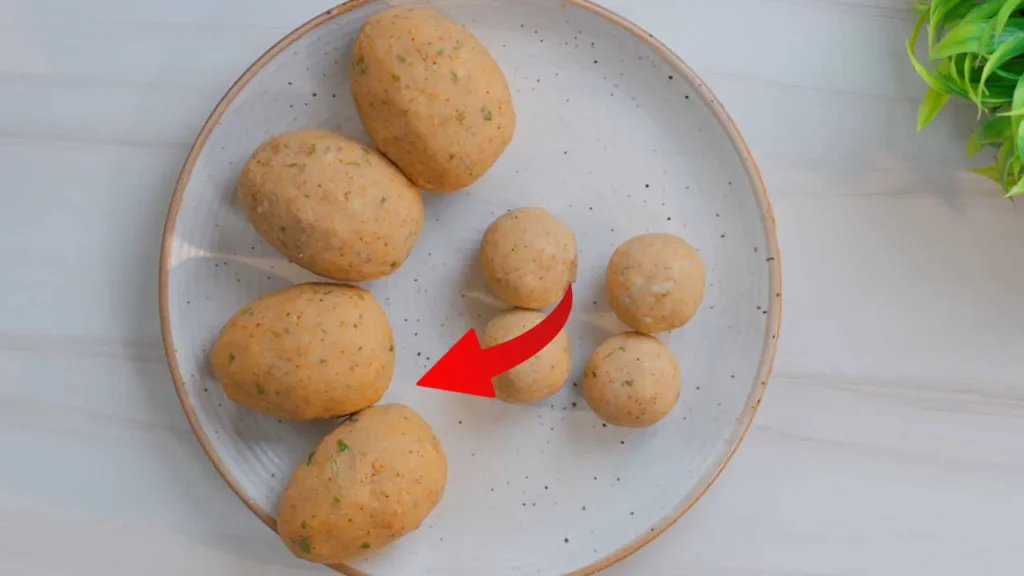
Divide the potato mixture into four equal portions. Try to keep each portion the same size so that all the koftas cook evenly.
Take one portion of the potato mixture and gently flatten it on your palm into a thick disc. It shouldn’t be too thin, otherwise it may tear while wrapping the egg.
Place one seasoned boiled egg in the centre. Slowly bring the potato mixture up around the egg, covering it from all sides. Gently press the edges together until the egg is completely sealed inside.
Once sealed, roll it lightly between your palms to create a smooth, round shape. If you notice any small cracks, simply smooth them out with your fingers. Even tiny cracks can allow oil to enter while frying, increasing the chances of the kofta breaking apart.
Repeat the same process with the remaining eggs.
If you have any potato mixture left over, don’t throw it away. Roll it into small bite-sized potato balls and fry them alongside the larger koftas. They make a delicious snack and can also be served in the gravy.
Before frying, let the shaped koftas rest for about 5–10 minutes. This short resting time helps the coating firm up slightly, making the koftas even more stable in hot oil.
Step 4 Fry the Koftas Until Crispy and Golden
This step is where most people mess up, but it’s easy once you know the tricks.Heat oil in a deep kadai.
It should be hot enough that a small piece of potato mixture drops in, sinks a little, then rises slowly with steady bubbles.Slide in 2–3 koftas at a time. Don’t overcrowd. Let them fry undisturbed for the first 2–3 minutes so the outer layer sets properly.
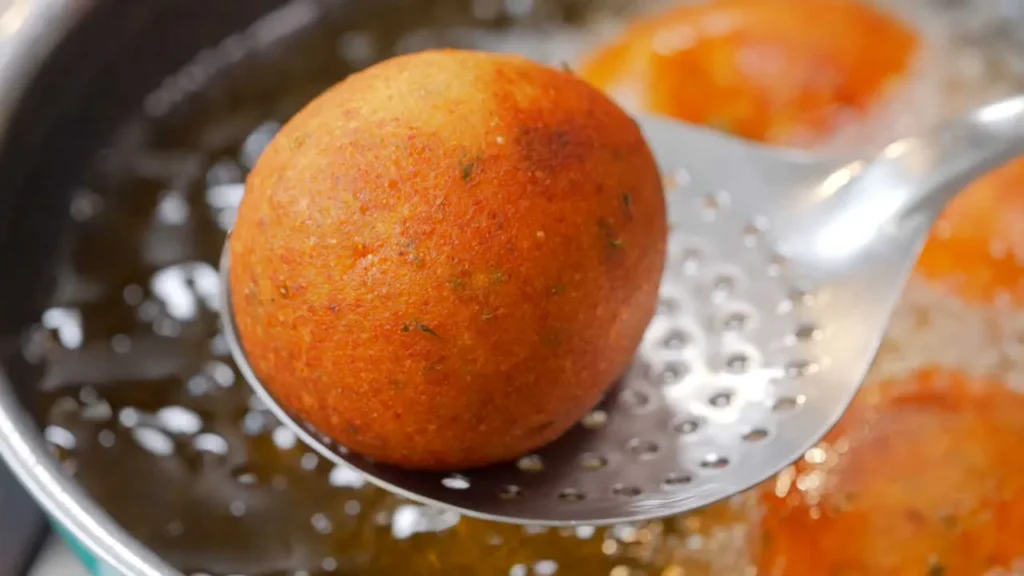
If you touch them too soon, they’ll crack.Gently turn them once the bottom is light golden. Keep rotating every minute until they turn a deep golden brown and sound crisp (about 6–8 minutes total).Take them out and drain on paper towels.
Let them cool for a few minutes — the shell gets even crunchier as they sit.
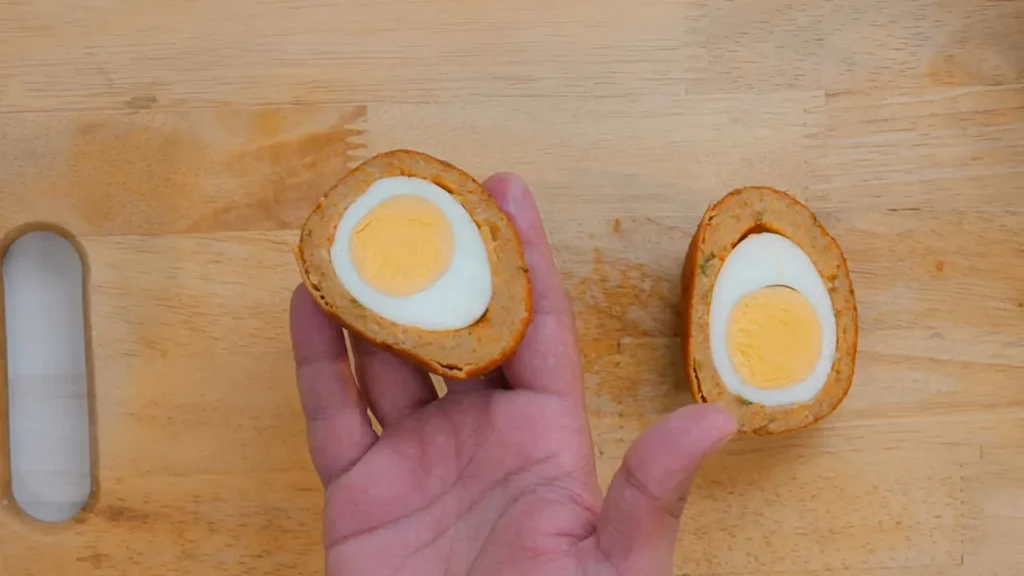
Once slightly cooled, cut each kofta in half with a sharp knife. This helps them soak up the gravy better when you add them later and makes serving easier. Do this right and your koftas will stay crisp even after meeting the gravy.
Step 5 – Making of Onion/Tomato Base
This is the step that gives your gravy its rich dhaba-style flavour, so don’t rush it.
Blend the onions and garlic into a smooth paste. In another blender, make a separate paste using the tomatoes, ginger, and green chillies.
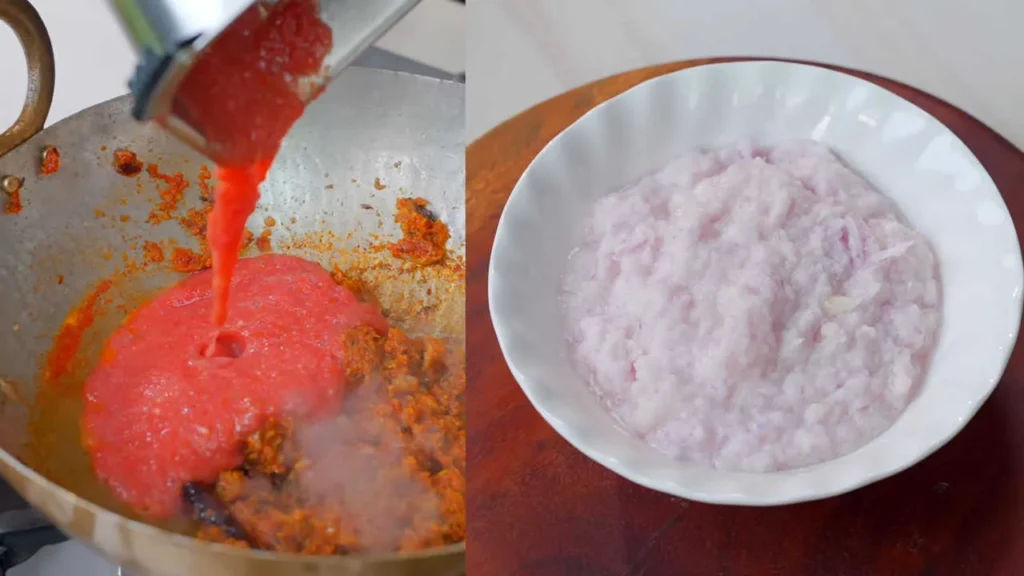
Heat oil in a heavy-bottomed kadai and add the cumin seeds. Once they begin to crackle, add the whole spices. Within a few seconds, you’ll notice a wonderful aroma filling your kitchen—that’s the spices releasing their natural oils.
Now add the onion-garlic paste. At first, it will look pale and watery, but keep stirring occasionally over medium heat. After about 10–12 minutes, the paste will turn light golden, become slightly thicker, and the raw smell will disappear. This slow cooking develops a natural sweetness and gives the gravy its deep, restaurant-style flavour.
Next, stir in the turmeric and Kashmiri red chilli powder, followed by the tomato paste, salt, and coriander powder. Cook until the tomatoes soften completely and the oil begins separating from the sides. This is a clear sign that your masala is perfectly cooked and ready for the next step.
Step 6 Finish the Dhaba Style Gravy
By now, your onion and tomato masala should be thick, glossy, and aromatic. If you notice oil separating around the edges of the pan, you’ve done everything right. This is the stage where the gravy develops its signature restaurant-style richness.
Now reduce the heat to low.
Take ¼ cup of fresh yoghurt and whisk it until completely smooth. Adding yoghurt without whisking may cause lumps, and adding it over high heat can make it curdle.
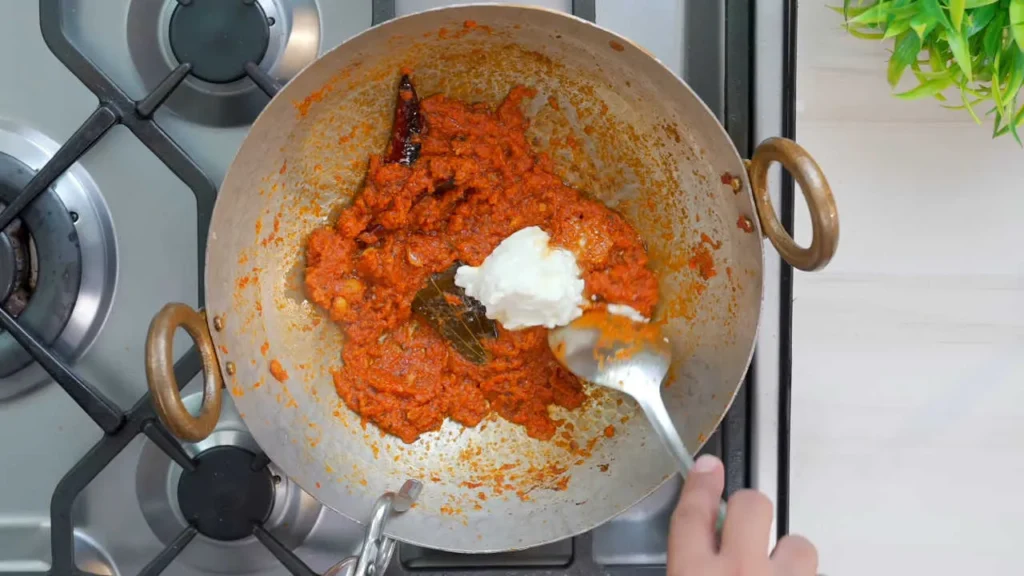
Slowly pour the yoghurt into the cooked masala while stirring continuously. Keep stirring for about 2–3 minutes until the yoghurt blends perfectly with the onion and tomato mixture.
You’ll notice the colour of the gravy becoming lighter and creamier.
Once the yoghurt is fully incorporated, add water according to your preferred consistency. If you’re serving the koftas with naan or tandoori roti, keep the gravy slightly thick. For jeera rice or plain steamed rice, you can make it a little thinner.
Mix everything well and let the gravy simmer over medium-low heat for about 8–10 minutes.
As it cooks, all the spices blend together beautifully, creating a smooth and flavour-packed curry.
Finally, add:
- Garam masala
- Roasted cumin powder
- Crushed kasuri methi
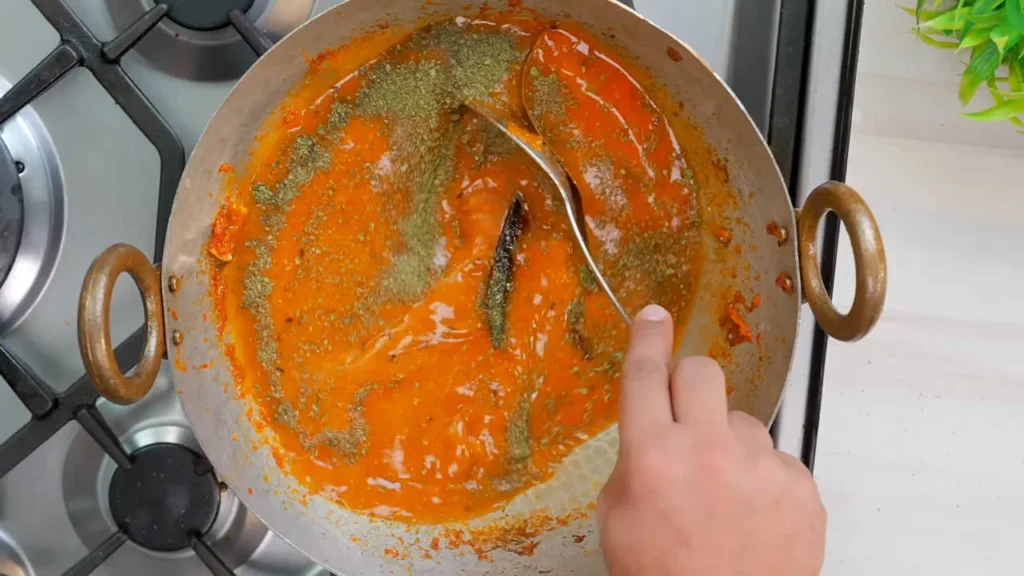
Before adding the kasuri methi, crush it gently between your palms. This simple trick releases its natural oils and gives the gravy that unmistakable dhaba-style aroma.
Allow the gravy to simmer for another 3–4 minutes. Taste it once before switching off the heat.
If needed, adjust the salt or spice level according to your preference.
At this point, your kitchen will be filled with the rich aroma of roasted spices, tomatoes, and kasuri methi—the unmistakable sign of a perfectly cooked North Indian curry.
Step 7 Add the Koftas and Serve
This is the final step, but timing is very important. Many people make the mistake of adding the koftas too early and letting them cook in the gravy for a long time. While this might seem harmless, it causes the potato coating to absorb too much gravy, making the koftas soft and soggy.
For the best texture, always add the koftas just before serving.
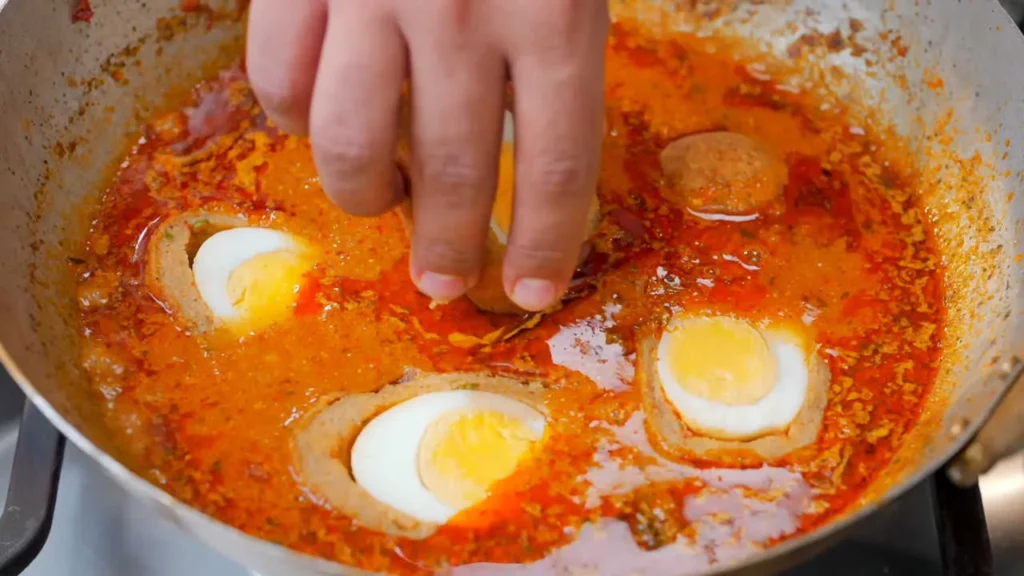
Carefully place each fried kofta into the hot gravy. Allow them to cook for only one or two minutes—just enough to absorb a little flavour while keeping their crispy outer layer intact.
If you’re serving guests, an even better option is to place the koftas directly into the serving bowl and pour the hot gravy over them. This keeps the outside wonderfully crisp while allowing everyone to enjoy the rich, creamy curry.
Before serving, slice one kofta in half to reveal the beautiful boiled egg at the centre. The contrast between the golden potato layer, the white egg, and the bright yellow yolk creates a stunning presentation that always impresses.
Finish with a drizzle of fresh cream and a generous sprinkle of chopped coriander leaves.
Serve immediately while everything is hot and fresh.
Serving Suggestions
Aloo Nargisi Kofta is a rich and hearty dish that pairs beautifully with a variety of Indian breads and rice dishes.
For a classic restaurant-style meal, serve it with butter naan or garlic naan. The soft bread is perfect for scooping up the creamy gravy. If you prefer something lighter, tandoori roti or phulka works equally well.
For festive meals, pair it with lachha paratha, whose flaky layers complement the smooth gravy beautifully.
Rice lovers can enjoy this curry with jeera rice, peas pulao, or simple steamed basmati rice. The fragrant rice absorbs the rich gravy perfectly, making every bite incredibly satisfying.
To complete the meal, serve it with:
- Onion rings
- Lemon wedges
- Mint chutney
- Boondi raita
- Fresh green salad
- Roasted papad
For special occasions, garnish the curry with a swirl of fresh cream, finely chopped coriander, and a pinch of crushed kasuri methi. It instantly gives the dish a restaurant-quality finish.
Storage and Reheating Tips
- If you have leftovers, store the koftas and gravy separately whenever possible.
- Place the gravy in an airtight container and refrigerate it for up to 2–3 days.
- The fried koftas can also be stored separately in the refrigerator for 1–2 days.
- When you’re ready to serve, simply reheat the gravy over low heat until it begins to simmer.
- Add the koftas only during the last minute of cooking. This helps them stay firm instead of becoming mushy.
- Although freezing the gravy works well for up to a month, it’s best to prepare fresh koftas whenever possible because freshly fried koftas always have the best texture.
Variations For You
Eggless Aloo Kofta
Skip the boiled eggs and simply shape the seasoned potato mixture into round koftas. Fry them until golden and serve in the same delicious gravy.
Paneer Stuffed Kofta
Instead of eggs, fill the centre with grated paneer mixed with chopped coriander, green chillies, and a pinch of garam masala. This version is especially popular during festivals.
Cheese-Filled Kofta
Place a cube of mozzarella or processed cheese in the centre of each potato ball. Once fried, the melted cheese creates a delicious surprise inside.
Air Fryer Version
If you prefer a lighter option, brush the prepared koftas with oil and air fry them at 190°C until crisp and golden, turning them halfway through cooking.
While the texture won’t be exactly the same as deep-fried koftas, they’ll still be delicious and significantly lighter.
Avoid These Mistakes
Even though Aloo Nargisi Kofta looks like a restaurant-style dish, it’s actually quite simple to prepare when you pay attention to a few important details. Here are some common mistakes that can affect the final result and how to avoid them.
1. Mashing the Potatoes Instead of Grating Them
Many people mash the boiled potatoes because it’s quicker, but grated potatoes create a much smoother coating around the eggs. They also hold together better while frying and are less likely to crack.
2. Using Hot Potatoes
Always allow the boiled potatoes to cool completely before grating them. Hot potatoes contain extra moisture, which makes the mixture sticky and difficult to shape.
3. Skipping the Binding Ingredients
Gram flour and rice flour are not optional ingredients. They help hold the potato mixture together and prevent the koftas from breaking apart in hot oil. If the mixture feels too soft, add a little extra gram flour until it becomes easy to shape.
4. Frying in Oil That Isn’t Hot Enough
If the oil is not properly heated, the koftas absorb too much oil and may start falling apart. On the other hand, very hot oil browns the outside too quickly while leaving the inside undercooked.
Always heat the oil well, then reduce the flame to medium before adding the koftas.
5. Turning the Koftas Too Early
Once the koftas are in the oil, leave them untouched for the first few minutes. This allows the outer layer to set properly. Turning them too early is one of the biggest reasons they crack during frying.
6. Rushing the Onion Masala
The flavour of the gravy depends on how well you cook the onion paste. If the onions are undercooked, the gravy will have a raw taste.
Cook patiently until the onions become golden and the oil starts separating.
7. Adding Yoghurt Over High Heat
Always lower the heat before adding whisked yoghurt. Stir continuously while mixing it into the gravy to prevent curdling.
8. Leaving the Koftas in the Gravy for Too Long
The potato coating quickly absorbs liquid. If the koftas sit in the gravy for too long, they become soft and lose their crispy texture.
For the best results, add them just before serving.
Tips for the Best Aloo Nargisi Kofta
- Grate the potatoes instead of mashing them for a smoother and stronger coating.
- Season the boiled eggs before wrapping them in potatoes for extra flavour.
- If the potato mixture feels sticky, chill it in the refrigerator for 15–20 minutes before shaping the koftas.
- Fry the koftas in batches instead of overcrowding the pan.
- Cook the onion and tomato masala until the oil separates. This is the secret to a rich, dhaba-style gravy.
- Crush kasuri methi between your palms before adding it to release its aroma.
- Add a small knob of butter at the end if you prefer an even richer restaurant-style taste.
- Garnish with fresh coriander and a swirl of cream just before serving for an attractive presentation.
Frequently Asked Questions
Yes. If you prefer an eggless version, simply prepare potato koftas and cook them in the same gravy. You can also use a paneer filling for a delicious vegetarian alternative.
Absolutely. Fry the koftas a day in advance and store them in an airtight container in the refrigerator. Prepare the gravy separately and combine everything just before serving.
Because the potato mixture contains too much moisture, there isn’t enough binding, or the oil isn’t hot enough.
Yes. Brush the prepared koftas lightly with oil and bake or air fry them until golden brown. Although deep-fried koftas are crispier, this method is a healthier alternative.
Starchy potatoes work best because they contain less moisture and hold their shape well after boiling.
This recipe has a medium spice level. You can easily adjust the heat by increasing or reducing the amount of green chillies and red chilli powder.
Yes.
It pairs beautifully with butter naan, garlic naan, tandoori roti, roomali roti, lachha paratha, jeera rice, peas pulao, or plain steamed basmati rice.
Final Thoughts
This Aloo Nargisi Kofta is one of those recipes that always impresses. Crispy potato outside, tender egg inside, and a rich dhaba-style gravy — it’s comforting, flavourful, and looks beautiful on the table.
I’ve been making it for years and it never fails. Simple ingredients, straightforward steps, but restaurant-level taste.
Perfect for weekends, festivals, or when you want something better than regular curry. Give it a try — it’ll become a family favourite.